Thursday, August 27, 2009

Camping - Lake Tahoe Desolation Wilderness

Trip: Camping - Lake Tahoe Desolation Wilderness
Dates: 21st Aug & 22nd Aug 2009
Route: Glen Alpine Trail Head -> Angora Peak -> Lake Aloha -> Heather Lake -> Susie Lake -> Gilmore Lake -> Mount Tallac -> Cathedral Lake -> Fallen Leaf Lake -> Glen Alpine Trail Head
Lowest Altitude: 6300 ft
Highest Altitude: 9800 ft
Howlas: 5

Day 0 - Collect Gear and Pack
Individual Gear:
1 cap/hat, 3 t-shirts/dry-fits, 1 shorts, 1 swimming trunks, 1 track pants, 1 fleece, 1 rain jacket, 3 pair socks, 1 pair hiking boots, sunglasses, 1 head lamp, 1 eating bowl, 1 spoon, toilet paper, medicines, 1 sleeping bag, 1 sleeping pad, 1 backpack, some cash, cellphone

Group Gear (group size 5):
2 tents, 2 Matches/Lighter, Purification Pills, Sunscreen (70SPF), Ziploc bags, mosquito repellent, duct tape, compass, 2 knives, 1 detailed map, 2 bear canisters, 2 cameras, for cooking - 2 pots/stove/fuel, food - carry mostly dry precooked food, extra batteries, 2 cameras, hand sanitiser.

With the above stuff...each backpack weighed between 26-30 lbs.

Activity: 5 of us got together at 5 PM on the Enterprise at El Camino Real to checkout the rented Kia. Chilled out at the swimming pool. Went to Stanford University to rent the camping gear at around 8 PM. It came to around $35 per person. Then we decided to eat some sushi...so we went to Sushitomi in Mountain View. It was nice. We were back by 10 pm. We packed and chatted till 12:30 AM...until we realized it was time to sleep.

Day 1: Drive to the Glen Alpine Trail Head & the 6 mile climb

Got up in the morning at around 3:30AM and were on the road by around 4:45AM on our crammed Kia. We had to reach the Rangers Station in order to get the permits for camping. The plan was to camp at Lake Aloha and there are only 36 people allowed in that area. We stopped for breakfast in between and were lucky enough to reach on time to collect the last 5 permits.

Map of the drive from Mountain View (A) to Glen Alpine Trail Head (C) through RangersStation (B)


We spent quite some time to find the Rangers Station. After getting the permits we started for the Glen Alpine Trail Head which was another hour. By the time we reached the Trail Head it was 11:30AM.

Address of the Rangers Station
United States Government Forest Service: Pacific Ranger Station
7887 Highway 50
Pollock Pines, CA 95726-9110
(530) 644-2349

We parked the battered Kia on the Glen Alpine Trail Head. Ate some bananas, took a pee on the rock, applied the sunscreen and were ready to hike. We took the tougher of the two routes available - one was a 6 mile climb through the Angora Peak and the other one was a milder trek of 4.5 miles. It turned out that Angora Peak was really very tough, especially for the first time climbers like myself. It was a unmaintained trail and was a steep climb through rocks and bushes from 6300 ft to 8400 ft. We started at 11:45 AM and with our slow pace reached the top at around 4PM. You get some quite beautiful views of Lake Tahoe, Fallen Leaf Lake and Echo Lakes from Angora Peak. We had lunch of burritos when we reached marker for Echo Peak and Lake Aloha.

The tough climb was done and it was another 2 hrs mild walk after that to reach our campsite. We reached lake Aloha at around 6:30 PM and found a nice campsite to setup our tents. We had finished the drinking water we had brought with us. We got some water from the lake and purified it. We had hot chocolate and a delicious dinner of lasagna, meat balls and chicken breasts...thanks to preserved precooked mountain food. After that we just lay on the rocks and looked at the star filled sky. I had never seen so many stars and since it was a moon less night, it made the sky all the more brilliant. That long hard climb of Angora Peak was worth it. We slept at around 11PM.


Day 2: 10 mile trek through Gilmore Lake & Mt Tallac and the drive back

Got up in the morning at around 7:30AM and had breakfast of oatmeal, bagels and salami along with black coffee. Then we decided to change into our swimming trunks and spend some time playing in the water. It was refreshing and we got some nice pictures of the lake. After breakfast, swimming and the daily routines we started to move forward with our 10 mile trek.


Our first destination was to reach Gilmore lake while passing through Heather Lake and Susie Lake. We started at 10 AM and reached Gilmore Lake at around 1:15 PM. The trail is maintained all along so it was not as tough as the first day climb of Angora Peak. Also our altitude at Aloha lake was 8200 ft and we gradually descended to 7800 ft until Susie lake and then we moved up to 8400 ft at Gilmore Lake. We had a light lunch at Gilmore lake and decided to climb Mt. Tallac.
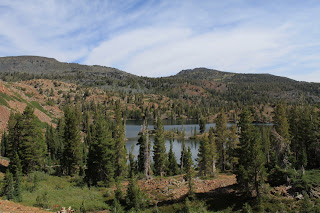
Base camp of Mt. Tallac was at 9400 ft while the peak is at 9700 ft. We decided to climb with our 28 lbs backpacks and then leave the backpacks at the base camp and climb to the peak of Mt. Tallac without them. It took us another 1 hour 15 mins to reach the base camp. The view from the peak of Mt Tallac was breathtaking. Lake Fallen Leaf looked like a small pond in front of Lake Tahoe. Mt Tallac is probably the tallest peak in that region and the panoramic view from its top is really beautiful. We spent some time taking pictures on the top and then started our descent.


The descent was tougher than expected. The terrain like everywhere else on the desolation was sometimes rocky, sometimes dusty and sometimes bushy. We had to descend around 3000 ft. We completed it in another 3 hours including a half an hour break at the cathedral lake. We were back to the Glen Alpine Trail Head by around 7 PM.


We were tired. We packed everything on the Kia and headed to an arbit Mexican bar...where I tried Mike's Hard Lemonade...which I hated. But the grilled chicken quesadilla felt good and we realized we had completed a nice trek.

Credits
The leader of our group was Abhay Sukumaran, who planned and managed the entire trek. The participants were - Nishant Joshi, Sumit Rangi, Tushar Shah and Sumit Saluja. The inspiration, i guess was for 5 friends to meet up after a long time. We may have been better off getting drunk at home....but none the less we realized that none of us has changed a single bit in 5 years. I also realized that you have to get your ass kicked to realize anything. Will do it again :)

Sunday, March 16, 2008

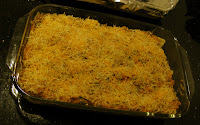
Italian Cooking - Lasagna Recipe

Now this one requires time and a little bit of expertise to make it, but once prepared you would realize that it is worth the effort. It is one of the best Italian dishes I have eaten, well probably because I ate the home cooked version. For people who don't know what Lasagna is - its another type of pasta. It comes in long flat strips, 3-4 cms wide and 12-15 cms long. Its prepared by making alternate layers of lasagna stripes, meat sauce and cheese one over the other. You prepare the sauce separately, boil lasagna and then make alternate layers. The outcome is layers of creamy, spicy, tangy and very tasty food. Well lets look at the recipe - its quite simple if you break it down into steps.


 Ingredients (for 5-6 servings)
  • 1 big chopped onion
  • 1 big chopped green bell pepper
  • 5-6 chopped green chilly
  • 1 large table spoon chopped garlic
  • 2 cup chopped spinach
  • 800 gm of Pasta Sauce
  • 400 gm Sour Cream
  • 1 large table spoon of red chilly powder
  • 2 tea spoons of Oregano
  • 500 gm ground chicken
  • 12 stripes of Lasagna 
  • Lots of Cheddar Cheese
  • Vegetable Oil
Preparation

Step 1 - Sauce Preparation
Start heating some oil (around 150 ml) in a large pan. When its slightly heated put 1 large table spoon of chopped garlic in it. After say 2 mins, add chopped onion and green chillies in the pan. When onions start to turn golden, add grounded chicken (keema), mix well and then cover it until the chicken gets cooked. Once the chicken is cooked add chopped green bell pepper and chopped spinach. Let it cook for sometime say 3-5 mins at medium heat then add salt, red chilly powder, Pasta Sauce (we used Francesco Rinaldi Chunky Garden Pasta Sauce) and oregano. Mix everything well and then leave it on medium heat until the spinach get cooked. When the spinach is cooked and the sauce is slightly thicker then turn off the heat and add Sour Cream to it. Mix it well and then taste the sauce - add extra salt, red chilly powder or Sour Cream as per your taste. All right your sauce is done now keep it aside. It is a creamy, spicy and tangy, i am sure you would love it. You can have your own version of sauce - just experiment carefully :)


Step 2 - Boil Lasagna
Boil water in a big bowl and add 12 stripes of lasagna, we used Ronzoni, Healthy Harvest whole wheat, you can use anyone available in your market. Also add some vegetable oil to the boiling water so that stripes of lasagna don't stick to each other. Cover it and boil the lasagna until it gets cooked. Once its done drain out the excess water and take out the lasagna stripes. Its very important that you don't overcook the lasagna and make it soggy. The stripes should be intact and see that they don't stick to each other. Ok you are done with step 2.

Step 3 - Layering
Hmm...Get a large rectangular glass bowl and apply a thin layer of oil on the sides and the bottom on the inside of the bowl. Now start making layers of lasagna stripes, sauce and cheese. First put 3 lasagna stripes in the bowl then put a layer of sauce on it and then sprinkle cheese on top of it, then start with another layer of lasagna stripes. Do it with for all the 12 lasagna stripes, so that you will have four layers. Cover the top most layer of lasagna with a lot of sauce and cheese. Cover the glass bowl with the silver aluminum sheet.

Step 4 - Oven
Lasagna is supposed to be served hot, so when ever you want to serve it just put the glass bowl in the oven preheated at 350 degree Fahrenheit and then keep it there until the cheese melts. It will take around 10-15 minutes. Once its done, take out the dish and serve.

Credits 
Ok again I learnt this from my Aunt - Pali Massi. I hope you liked it. You can make various variants of the sauce and also use it with normal pasta or noodles they all turn out to be equally tasty. Lasagna gets some extra points just because of its eloquent layering.

Sunday, March 2, 2008

Book Review: A Clockwork Orange by Anthony Burgess

Well well well well well... Nachinat...droogies this is one horrorshow book. Splattered all over with red red kruvvy and oozhassny acts like oobivating baboochka, sodding little devotchkas and tolchoking starry lewdies, with a smirk of radosty and a malenky bit of sarky soviet for society, o my brothers.

Thats Nadsat for you - the language of youth in Anthony Burgess's classic, A Clockwork Orange. It was first published in 1962 and since then it has become a cult book among the literary class. When I picked up the book and started reading it, I was only able to read 10-15 pages in few hours, that was because Burgess has invented a new language, Nadsat. Most of the words in Nadsat are derived from Russian and if you don't know Russian it will be very difficult for you to pick up the language. After reading the first 10-15 pages I knew that I needed a dictionary which has the entire vocabulary of Nadsat. I googled and found one on the internet - http://soomka.com/Nadsat.html. It turned out to be a very useful link and after that language was fluid and I finished the book in matter of hours. Its a very well written book and the language is so catchy and cool that after you finish the book, you can not stop yourself from speaking in Nadsat for a while.

The story revolves around Alex, who is also the humble narrator. He is the devil incarnate, he goes around with his gang of friends assaulting, raping and robbing people without any guilt and with all the joy, and thats his nature. He is a teenager who is wild and without direction or control. Society wants otherwise and they want to turn him into a good, mannered boy, but at what cost. Its an individual who has the right to choose between good or bad, its his conscience. It should not be imposed upon him, because doing so may take away his true character. And this true character and unrestrained will, differentiates human life. The writer has brought out this question very well and makes you think about it. The question is - individuals make society or society makes an individual.

The book is also sometimes compared to other dystopian novels like 1984 and brave new world. In my opinion, 1984 by George Orwell is a much deeper book. Orwell has created a much stronger story, his world is also hypothetical and nearly inhuman, but he has touched the subtle emotional aspects in a very humane manner, which I think is lacking in A Clockwork Orange.

A lot of credit for the publicity of the book should go to Stanley Kubrick's adaptation of the book in his 1972 movie by the same name. The movie hits you as much as the book. It is very well directed and visualized. But I guess the story is better told in the book and you can not concentrate on the language if you just watch the movie. Nadsat is the best part and you enjoy it much more while reading. So my brothers, first read the book and then see Alex come alive in Kubrick's - A Clockwork Orange.

Wednesday, February 13, 2008

Photography and Optics

Photography is all about capturing light. The entire essence is captured in the meaning of the word Photo-graphy which means "drawing with light". On the other hand Optics is the study of light and it tries to explain the optical phenomenon in a scientific manner. We all have done optics experiments when we were kids. I have spent many hours sitting out in the sun, playing with a convex lens trying to burn paper by concentrating the rays of sun on it. So you see such a simple experiment shows that light is just another form of energy which when concentrated can even burn paper. Photography involves a similar phenomenon, light waves are simply captured by a lens system and concentrated on a film (chemically treated) or a digital sensor, for a small period of time. This film or digital sensor produces the image as seen by the lens system of the camera. This is pretty much how our eyes function as well, in their case cornea is the lens and retina is the film/digital sensor.


So its all about light. Try answering these simple questions - what is light, how does it originates, how do you explain colors, why do different objects have different luster and texture. Proposing an hypothesis to explain the phenomenon of light must have been a challenging task. People have been amazed by what they see and some people get more excited if they are able to discern a pattern or fit it all into a model. There have been discussions to represent light as a wave (Hooke-Huygens-Young) or as a particle (Newton), later Maxwell studied light as an electro-magnetic wave and finally Einstein explained the optical phenomenon with the help of his Wave-Particle duality theory, which also laid the foundation for Special Theory of Relativity.

Lets look at the following concepts in order to get a better understanding -

The Concept of Energy!
Well energy is everywhere. Its just the form which varies. Its very similar to the concept of a number line. Its we humans who define numbers in the number line in order to differentiate them, so that they can be better understood and used for various purposes like counting or for quantifying distances etc. There is actually no difference between 1 or 10.434 or some irrational number...they are just points which make up the number line or for that matter the complex space or the sphere or the point. I think you get the point. Lets move further. So i would say everything is some form of energy, someplace where it is dense...then we may call it a solid object, other places where it is less dense, we may call it fluid. Again density is just another concept i.e. the way you observe things.

The Concept of Light!
All objects at all times are emitting some form of energy, a part of this is called light. So just imagine a case where there are only two objects - the Sun and you (your eye). Sun emits some energy (almost the entire spectrum of wavelength) which falls on your eye. The eye will absorb this energy and will interpret it in its own way. Its like Sun is communicating with your eye with the help of light energy and your eye interprets this signal as white light. Now imagine if there is another object say a red ball. The rays of sun fall on this ball. The ball is just another object which will absorb some amount of energy, emit some, transmit some and also reflect some. Since this ball appears as red to our eye, it means that the final outcome of this absorption, emission, transmission and reflection is a light wave with wavelength 630nm-700nm and some specific frequency which is interpreted by us as red in color.

The Concept of Color!
The waves of energy reaching our eyes have some properties - velocity, frequency and wavelength. We differentiate different waves based on these properties. Now if you take the wavelengths and arrange them in a number line then this number line is what we call a spectrum of colors and we recognize different colors by different set of wavelengths on this spectrum. Like red is 630nm-700nm, green is 490nm-560nm and violet is 400nm-450nm, this range (400nm-700nm) is pretty much the color spectrum recognized by the human eye. We can interpret the wavelengths in this range. We need to understand that different waves interfere with each other and produce a combined effect by the time they reach the eye.
So if the signal consists of different waves of almost the entire spectrum then these waves appear as white to our eye, whereas if the signal consists of waves which lie outside our visual spectrum then this appears as black.

Lets get back to Photography!
As i said earlier - Photography means drawing with light. The instrument used for this purpose is the camera, which consists of a lens system and a sensor where the image is formed. To form the image you need light to fall on the sensor only for a small time. We can imagine the sensor as our canvas where our image will be formed, lens can be assumed as a funnel through which different colors (light/image) will fall on our canvas. Now lets look at the following basic terms used in Photography -

Exposure - The process of image getting formed on the digital sensor/film (canvas) is called
Exposure. If a lot of light, more than what is required to make a proper image, falls on the digital sensor/film then the image will be over exposed. Its very similar to pouring a lot colors through the funnel on to the canvas and the colors splash out when they fall on the canvas. Similarly if light falling on the film is less than required to create an image then the image will be dull i.e. under exposed. Proper exposure is very important in order to get a clear image - neither very bright nor dull.

Aperture - Aperture is the size of the opening of the lens on the camera. You can compare it to the size of the funnel hole. Crudely speaking the larger the size, more is the amount of light that can enter the lens system. So time required to create an exposure will be less if the aperture size is large. Depth of field of an image mostly depends on the size of the aperture along with other things like the focal length of the lens. Generally speaking larger the aperture smaller is the depth of field and vice versa.

Shutter Speed - Shutter Speed is the time for which the aperture remains open and allows the light to enter the camera, so shutter speed is another thing which controls the amount of light entering the camera and hence is very important to achieve the correct exposure. So if you increase the aperture size and you want to keep the same exposure then you would have to increase the shutter speed i.e. the shutter will close quicker now. We need to understand that the actual image can be very different with fast or slow shutter speed. Fast Shutter Speed freezes motion and is generally used to capture fast moving objects like in sports or kids who wont stay still for that perfect picture. Slow Shutter Speed is generally used to capture images shot in low light of static objects, like of a distant skyline at night. Slow Shutter Speed can also be used to imply motion, by keeping both the static and moving objects in the picture. Use of a tripod is recommended while using Slow Shutter Speed.

Light Meter - How do you know that you have the right exposure, that is you have the correct aperture and shutter speed settings. Light meter present on your camera is your guide. Light meter analyzes the scene and evaluates and measures the light offered by the scene. There are many evaluative methods that can be used by the camera like center-weighted, matrix-based etc. and based on these methods the light reading is obtained. You may use these readings as a reference while setting up your aperture or shutter speed.

ISO - ISO decides the sensitivity of the film or the digital sensor. It can be compared to the absorption strength of the canvas. Higher the ISO higher is the sensitivity and lesser amount of light is required to achieve the same exposure. So higher ISOs are again used for low light photography or for capturing fast moving images. Generally most of the exposure settings can be controlled with the help of aperture and shutter speed, while keeping ISO at 100 or 200.

Focal Length - To understand the importance of focal length, we need to understand image formation by a convex lens. All lens systems in a camera can be represented by an equivalent convex lens of a given focal length forming a real image on the film or digital sensor.


Look at the lens diagram given above, image formation for a thin lens is governed by the following formula -

1/S1 + 1/S2 = 1/f

and Magnification = - S2/S1 (negative sign means that the image is inverted as compared to the object)

Here
f is the focal length of the lens
S1 is the distance of the object from the lens
S2 is the distance of the image from the lens

Now if you keep the focal length as same and increase S1, then you will notice that S2 will decrease as per the above equation. Also notice that Magnification of the image will also decrease. Which means that as the distance of the object increases from the lens, its image is formed nearer to the lens on the other side. The digital screen or the film where image is formed in a camera is at some fixed distance from the lens. So out of all the objects in your view, the object whose image is formed on the digital screen or film is said to be the object in focus. All the other images won't be as sharp as of this object. Now suppose that the object is placed right at the focal distance of the lens so that S1=f, in this case as per the equation
1/S1+1/S2 = 1/f

1/S2=0 i.e. S2 tends to infinity. So the image of the object will be formed at infinity and if S1 is less than f then image is formed on the same side as the object, which is the virtual image and it is no good to be captured by the digital sensor or the film. So if you want to photograph something really close to your camera, you need to have a lens with really small focal length i.e. for Macro Photography.

Film Size - Film size or the size of the digital sensor is actually the size of your canvas, where the image is drawn. Generally the film size is 35mm (diagonally). So the image we draw is also limited by the canvas size, which means that image magnification is important. This is where the Magnification formula comes into play -

Magnification = -S2/S1 = f/(S1-f)

Telephoto Lenses - We can see from the above equation that if you increase f and keep S1 constant, this is going to increase the magnification i.e. a bigger image of a distant object will be formed if you use a lens with larger focal length, these lenses are Telephoto Lenses, as they help you get a magnified image of a distant object.

Wide-angle Lenses - On the other hand if you decrease f and keep S1 constant, this is going to decrease the magnification, which you may feel is not exactly desirable. But consider an object in a scene near you, this object because its near has a good enough magnification, but it may happen that it is filling up all the space of your film canvas. So what do you do to get more of the scene on your canvas - you use a lens with a smaller focal length, this will make the object smaller on your film canvas and you can accommodate more of the scene. These lenses are Wide-angle lenses, as they help you get a wider picture.

Ultimately its Creativity!
I have spoken a lot about optics and photography, but the intention was not to confuse you or boggle you with nerd terms. I have tried to apply basic optics in order to understand how a camera works. These are just the basics, and there is a lot of creativity involved in using each aspect of your camera. As i said photography is drawing with light, so light and camera are just the tools which you can use for your drawing, but what you draw and how you draw depends on your vision and creativity.

The first step would be to understand what are the features provided by your camera and use them fully. It may be a basic digital camera, but you should definitely try to understand and use all its features. Once you start understanding it, you will see how much fun it is, and then you may even become oblivious of the optics behind your camera because your creativity will take over and i think that would be really cool :))

References
Here is a list of some good starter websites and books -
  • Understanding Exposure by Bryan Peterson - This will explain you the 3 key factors involved to get the correct exposure - Aperture, Shutter Speed and ISO. Excellent book to start with, it also has some brilliant pictures which will inspire you and push you deeper into photography. A must have book, don't wait to buy it if you are interested in taking good pictures.
  • photo.net- Excellent reference site for tutorials on photography, news and reviews about photography equipment, forums and discussions, pictures. Its a real good site.
  • dpreview.com - Look here for in depth expert reviews on cameras and lenses. They cover their reviews in detail and it will definitely help you in making that choice.
  • Wikipedia - I don't have to comment on wikipedia, but like for everything, it is also the ultimate source of information on optics, light, lenses, photography etc.

Thursday, December 27, 2007

Book Review: Kitchen Confidential by Anthony Bourdain

Have you seen the TV series - No Reservations. The guy who hosts that series is Anthony Bourdain. "No Reservations" is a travel show in which Bourdain moves around different cities/continents in search for an original culinary experience. What impresses me is that this guy is just not afraid. He is not prejudiced and is ready to try any food in the world given that it is adventures and authentic. You can see him killing a pig with a spear in Malaysia, consume a soup prepared from private parts of a mule in Indonesia, stand in icy cold water stream wearing just a thin robe in Japan, learning trapeze in New York City, getting twisted and turned all over in a traditional bathing house in Uzbekistan while savoring cuisines every where. Once he also got trapped in the middle east crisis while visiting Beirut, but they didn't stop and made an episode out of that as well. He has travelled across Europe, Russia, China, India, Malaysia, Vietnam, Korea, Japan, North America, South America and Africa. Anyone who respects good food will accept that it can come from any part of the world. Good food, if prepared properly will taste good and it happens only occasionally that you don't appreciate a well prepared meal. I guess that's the philosophy behind the show.


Well well, he has not always been a celebrity traveling first class around the world, enjoying five star life and tasting good food prepared especially for him. He was not picked up randomly. He has made it so far in the restaurant business right from the very bottom. He has washed dishes, shredded vegetables, sweat all day at the saute station, burnt his hands and cut his fingers for nearly 30 years and he has loved it. "Kitchen Confidential" is Anthony Bourdain's story. He tells you about his experience in the restaurant business and as he has seen a lot, he has a lot to tell. He has worked in numerous restaurants throughout New York City with both the big and the small and probably performed all the roles in the kitchen.

When I bought the book, I thought it will be more about cuisines and love of food etc. but this guy surprised me. The book should be rated R or rather NC-17 for its sexual content, drugs, violence and foul language. Well whatever the rating, its an original way of telling the story and that's what you like. He talks more about running of a restaurant, different people in the kitchen and their roles. He talks about his life and how he got into cooking and how he got inspired at various stages of life and moved forward. He has inserted a chapter on his trip to Tokyo, where he got influenced by the eastern culture and life. I guess many people who love food and know a celebrity chef like Bourdain would like to read this book. Bourdain will tell you exactly what kind of people will fail in the restaurant business. Its not just about love of food but also a lot about logistics, people management, making right decisions and probably love of food will come last in the list. I would say, if you ever wished to open a restaurant or wanted to know what goes on behind the scenes in a restaurant then pick up this book and read. Probably it wont stop you from eating out but it will surely change the way you look at waiters, chefs and the food that you order. 

So go ahead, read and enjoy the meal.

Saturday, December 15, 2007

Upside Down Pineapple Cake

Today I learnt to make the Upside Down Pineapple Cake. Well its pretty simple to make - all you need is the cake mix, some eggs, vegetable oil, brown sugar, grated coconut and a can of crushed pineapple.

First the Cake Mix - We used the Betty Crocker Super Moist Cake Mix (Lemon Flavor- 517 gms) - it basically contains everything a cake mix should contain like flour, baking powder, sugar, corn starch, oil etc, etc in the right quantity. All you need to do is follow the instructions on the box and create the cake mix. You need to add 3 eggs and 1/3 cup of oil and stir it well. Once done leave it aside.

For the Top View - Get a small glass bowl and other ingredients - 1/2 cup of oil, 1 cup of brown sugar, 1/2 cup of grated coconut, and 1 can (20 ounce) of crushed pineapple. If the glass bowl is a big rectangular bowl it will be better. The cake should be around 4-5 inches tall. In the glass bowl first put a butter paper, then spread 1/2 cup of oil on it, then spread 1 cup of brown sugar, then 1/2 cup of grated coconut and graciously spread the full can of crushed pineapple over it.
Now over it just pour the cake mix evenly and its done.

Oh wait you need to bake it as well. So first pre-heat the oven at 350 degree Fahrenheit (i.e. 175 degree celsius) then put the unbaked cake inside for around 40 - 50 mins. Keep checking the cake after every 10-15 mins. You will see it getting brown and rising slowly. Once you feel its done, put a toothpick in and see if it is uncooked. Or if you don't give a damn then just trust the oven and take the cake out after 45 mins. Last but not the least turn the cake upside down, so the pineapple that was the last layer, will become the top layer. (Now you know why the name is Upside Down Pineapple Cake). Tan-ta-na its ready - its time to take a bite of your creation.

Statutory Warning - The one I made was quite tasty, if you are trying it at home then just wish that I wasn't lucky. Good Luck!

Credits - I made the cake under expert supervision of my Aunt - Pali Massi, its her recipe. She is a great chef, I will try and steal as many recipes i can from her just for the benefit of hunger stricken, malnourished people like me, who just want to eat good food made at home.

Monday, October 8, 2007

Book Review: The Dragons of Eden by Carl Sagan


I just completed reading a book called The Dragons of Eden by an eminent scientific writer Carl Sagan. I picked up this book randomly from a book store. I have read Carl Sagan before, Cosmos - the book which opens up windows to scientific thinking, mathematics and of course astronomy, was very exciting and i would say my first scientific novel. I have also seen the movie Contact, which is based on a book by the same name, and its good.
So Dragons of Eden also promised a lot. Many times i have had discussions with my friends on topics like the difference between creativity and the clockwork attitude, comparison of artificial intelligence (computers) with human brain, evolution of human beings, what are dreams, why do we need to sleep, reproduction and many others. All these topics deal with biology and the way we perceive things around us. You can come up with so many different hypothesis to explain the above mentioned questions. What Carl Sagan does in this book is that he comes up with various scientific experiments that have been conducted and based on these he has discussed various hypothesis. These experiments seem to fit right in and corroborate these hypothesis.
The book is well written and is easy to understand. The reader can ignore the technical terms and look at the underlying logic or may be understand some terms from the appendix given at the end of the book.
This book was written some time around 1975 and i was amazed by the level of knowledge that Carl Sagan was able to extract at that time. A lot of new experiments have been conducted after 1975, but still the content of this book is very refreshing and by no means out dated. Carl Sagan prophecies that in future the level of understanding of human brain will be much greater and hence can provide answers to some ethical questions facing mankind like the definition of death, the legal issues of abortion, understanding of various cultures - including extra terrestrial life forms and animals. He also discusses computer gaming (imagine in 1975) and the way it can help spread an interest in science.
The price of the book in India is Rs. 250 and the book is published by The Ballantine Publishing Group.
Recommendation: Don't miss it if you have scientific bend of mind - it may answer a lot of questions.

Sunday, August 12, 2007

Cooking and Thermodynamics

The zeroth law of Themodynamics states that When two systems are put in contact with each other, there will be a net exchange of energy between them unless or until they are in thermal equilibrium, that is they contain the same amount of thermal energy for a given volume (say, 1 cubic centimetre, or 1 cubic inch.) - wikipedia.

Well the above law was cited to appear a little nerdy and later half of this blog will prove that when it comes to practicals my mother knows more about thermodynamics than me... and of course she cooks better.

Cooking is a great art but art is more subjective than objective. I say this because the complexities and factors involved in making tea or boiling an egg are far more than any thermodynamics experiment i have conducted. Don't ask me the complexity of making Mutton Rogan Josh. In this post i would like to give cooking a little objective look, so nerds like me can obtain the pleasure of live demostration of laws of thermodynamics and if they have any fears of cooking, they can extirpate them.

Cooking involves not just heating raw food, but also mixing of n number of substances like salt, water, meat, vegetables, spices, juices etc. Lets first take up heating and learn some basic thermodynamics. The outcome of zeroth law of thermodynamics can be that heat flows from a hotter to a cooler body, if they are brought in contact. This heat transfer will stop when temperatures of both bodies are in equilibrium. Heat Transfer can occur in 3 different ways - Conduction, Convection and Radiation. Out of these the most common way is Conduction, which involves two bodies (generally solid) coming in direct contact to transfer heat. Convection, which is made common by some Microwave ovens, involves transfer of heat through and with the help of fluids (air, liquid). Radiation, doesn't require any medium, this is the way used by Sun to heat up the earth.

Now let us look at the Fourier's law (nerdy for Law of Heat Conduction) which says that the rate of heat transfer through a body in contact with a heat source will depend on Heat Resistivity (good/bad conductor of heat), Surface Area of the body in contact with the heat source, temperature difference between the bodies and the thickness of the body.
So what does it mean in the cooking language -
  • Heat Resistivity - Why does it take more time to cook mutton than to cook chicken, because the resistivity of mutton is less than that of chicken. A more direct example will be that of wood and metal. Metal has greater resistivity than wood. So wood will take much more time to heat up than metals. Next time you are cooking keep in mind the resistivity of your raw material.
  • Surface Area in contact with Heat Source - The greater the area in contact the more the time it will take to transfer heat. So if you use a flat bottom utensil to heat, you know its going to take more time, but remember your food will be more evenly cooked. Thats why it is said that if you cut the meat/vegetable in proper shape, they will cook well. As the transfer of heat is even through them.
  • Temperature Difference - Well this one is quite intuitive isn't it. But don't forget Newtons Law of Cooling (Newton seems to be everywhere from gravity to thermodynamics...i wonder if he was a good chef as well) - it says that the greater the temperature difference between two bodies the faster heat transfer will take place, so if the temperature difference was 30 degrees initially - Newton says that it is going to take lesser time to bring the temperature difference to 20 degrees than from 20 degrees to 10 degrees. It means if you took something out the refrigerator then it will not exactly take twice as much time to heat up...but it will take around 1.5 as much time or so.
  • Thickness - Now when heat will exactly reach a point on your vegetable depends on how far is it from the heat source. The farther the distance the more time it is going to take.
Okay much of thermodynamics - now lets come to serious cooking. When you are cooking something you want it to be evenly cooked, you wont like your vegetables to be left raw from inside. It is important to understand that if your cooking something at a very high temperature, then its resistivity is going to decrease with time (this is what is called burning) and this will further slow down the flow of heat inside. Your outer surface will burn and will not transfer any heat inside and hence your food wont get cooked from inside. In general if you want to cook, then initially cook it up on slow heat (low temperature) so that resistivity of the substance doesn't breaks down and heat will get time to reach deep inside. And if you want to make it crispier (i.e. burn it from outside) then just turn up the heat (increase the temperature) for a short period of time.

Well as i said cooking is a great art and it involves not just heating but also mixing up so many other things, and doing them at the right time. The best way to train your mind to such a complex art it go out and explore and experiment. Science is good but taste is heavenly :)
Here is some Dilbert for you...trying to cook like an engineer :)